
How to collect UGC without social media using Flockler’s Submission Forms
Available for Pro and Premium Plans
With Flockler, you can not only pull in existing content from your social media channels, but also collect UGC directly from your visitors. Our Submission Form feature makes this easy.

Here’s a step‑by‑step guide on how to gather users’ content, feedback, and reviews on your site.
Step 1. Create your Form
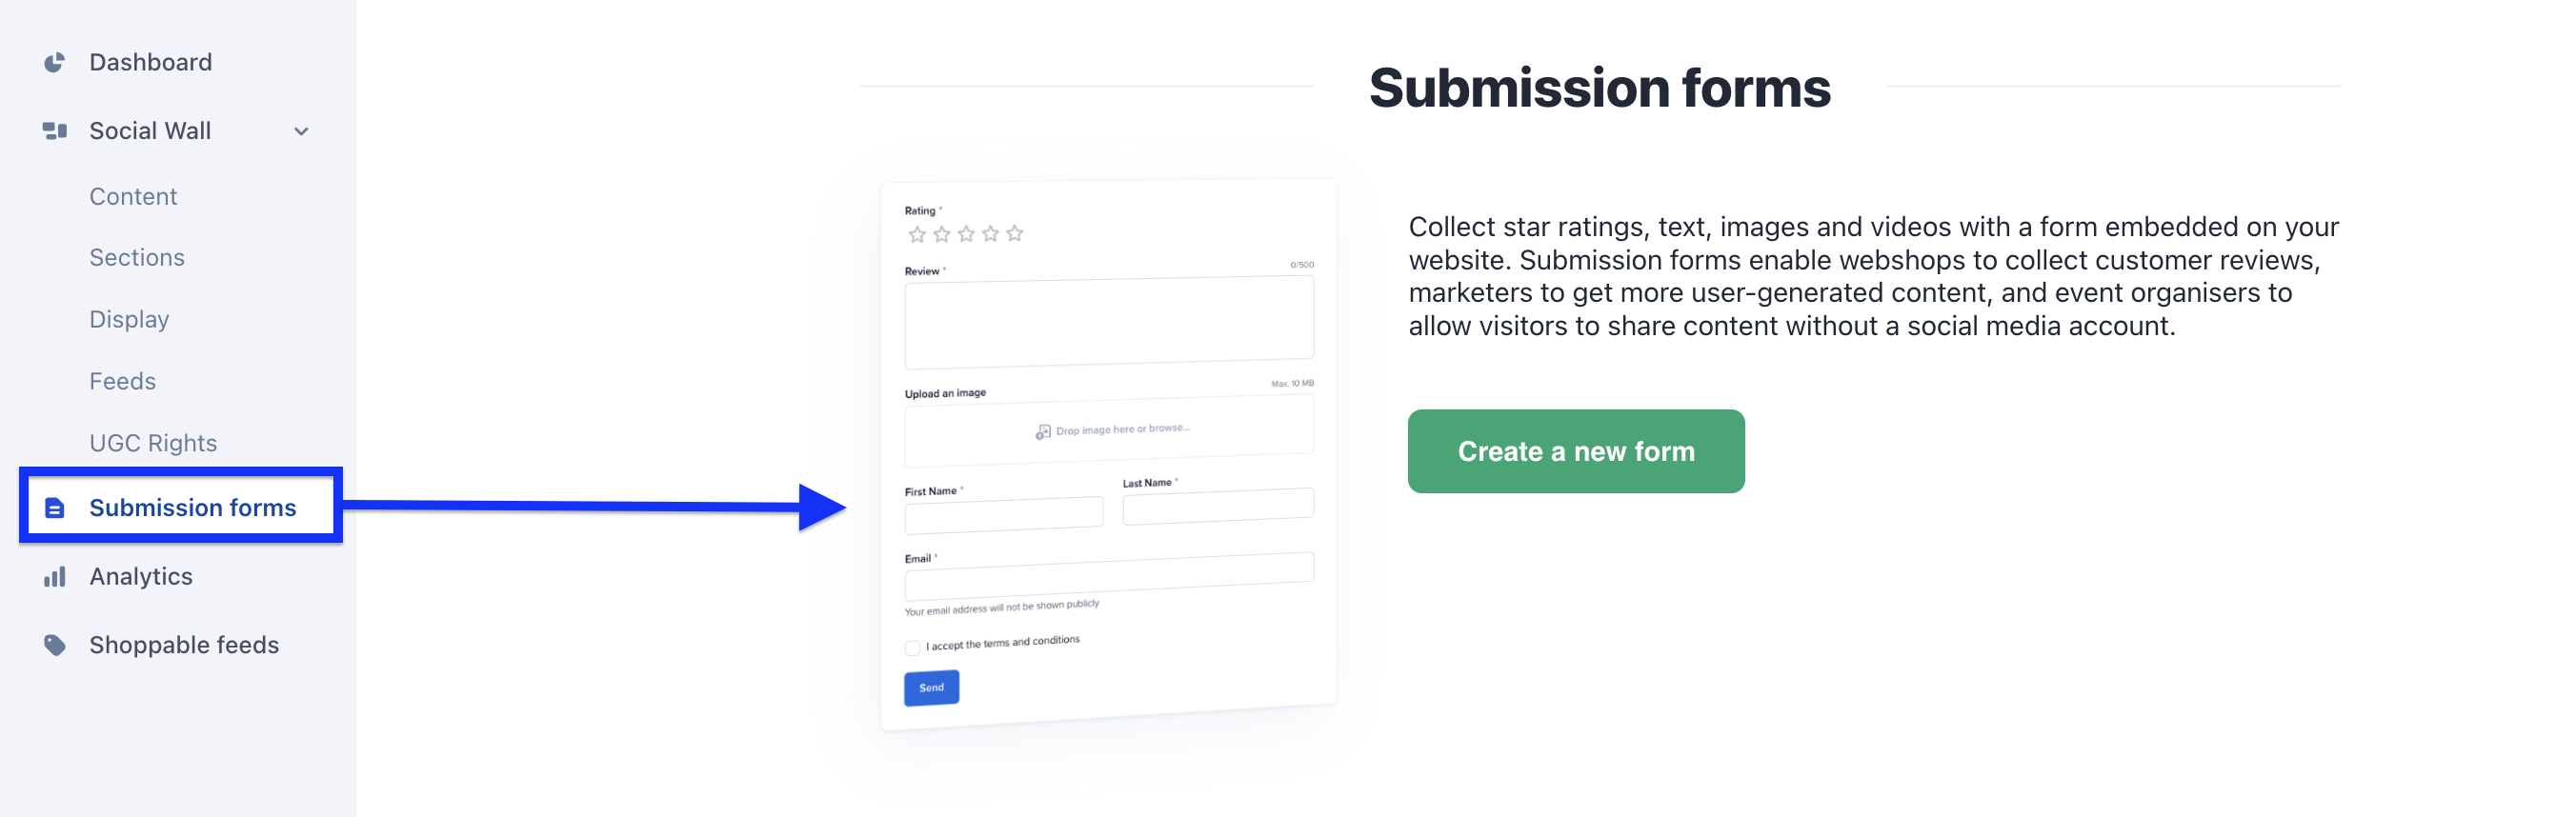
Log in to your Flockler account, go to the Submission forms tab, and click [Create a new form]
Step 2. Choose Fields
Start from Fields, where you choose which inputs to include. Tick or untick a checkbox to add or remove a field:
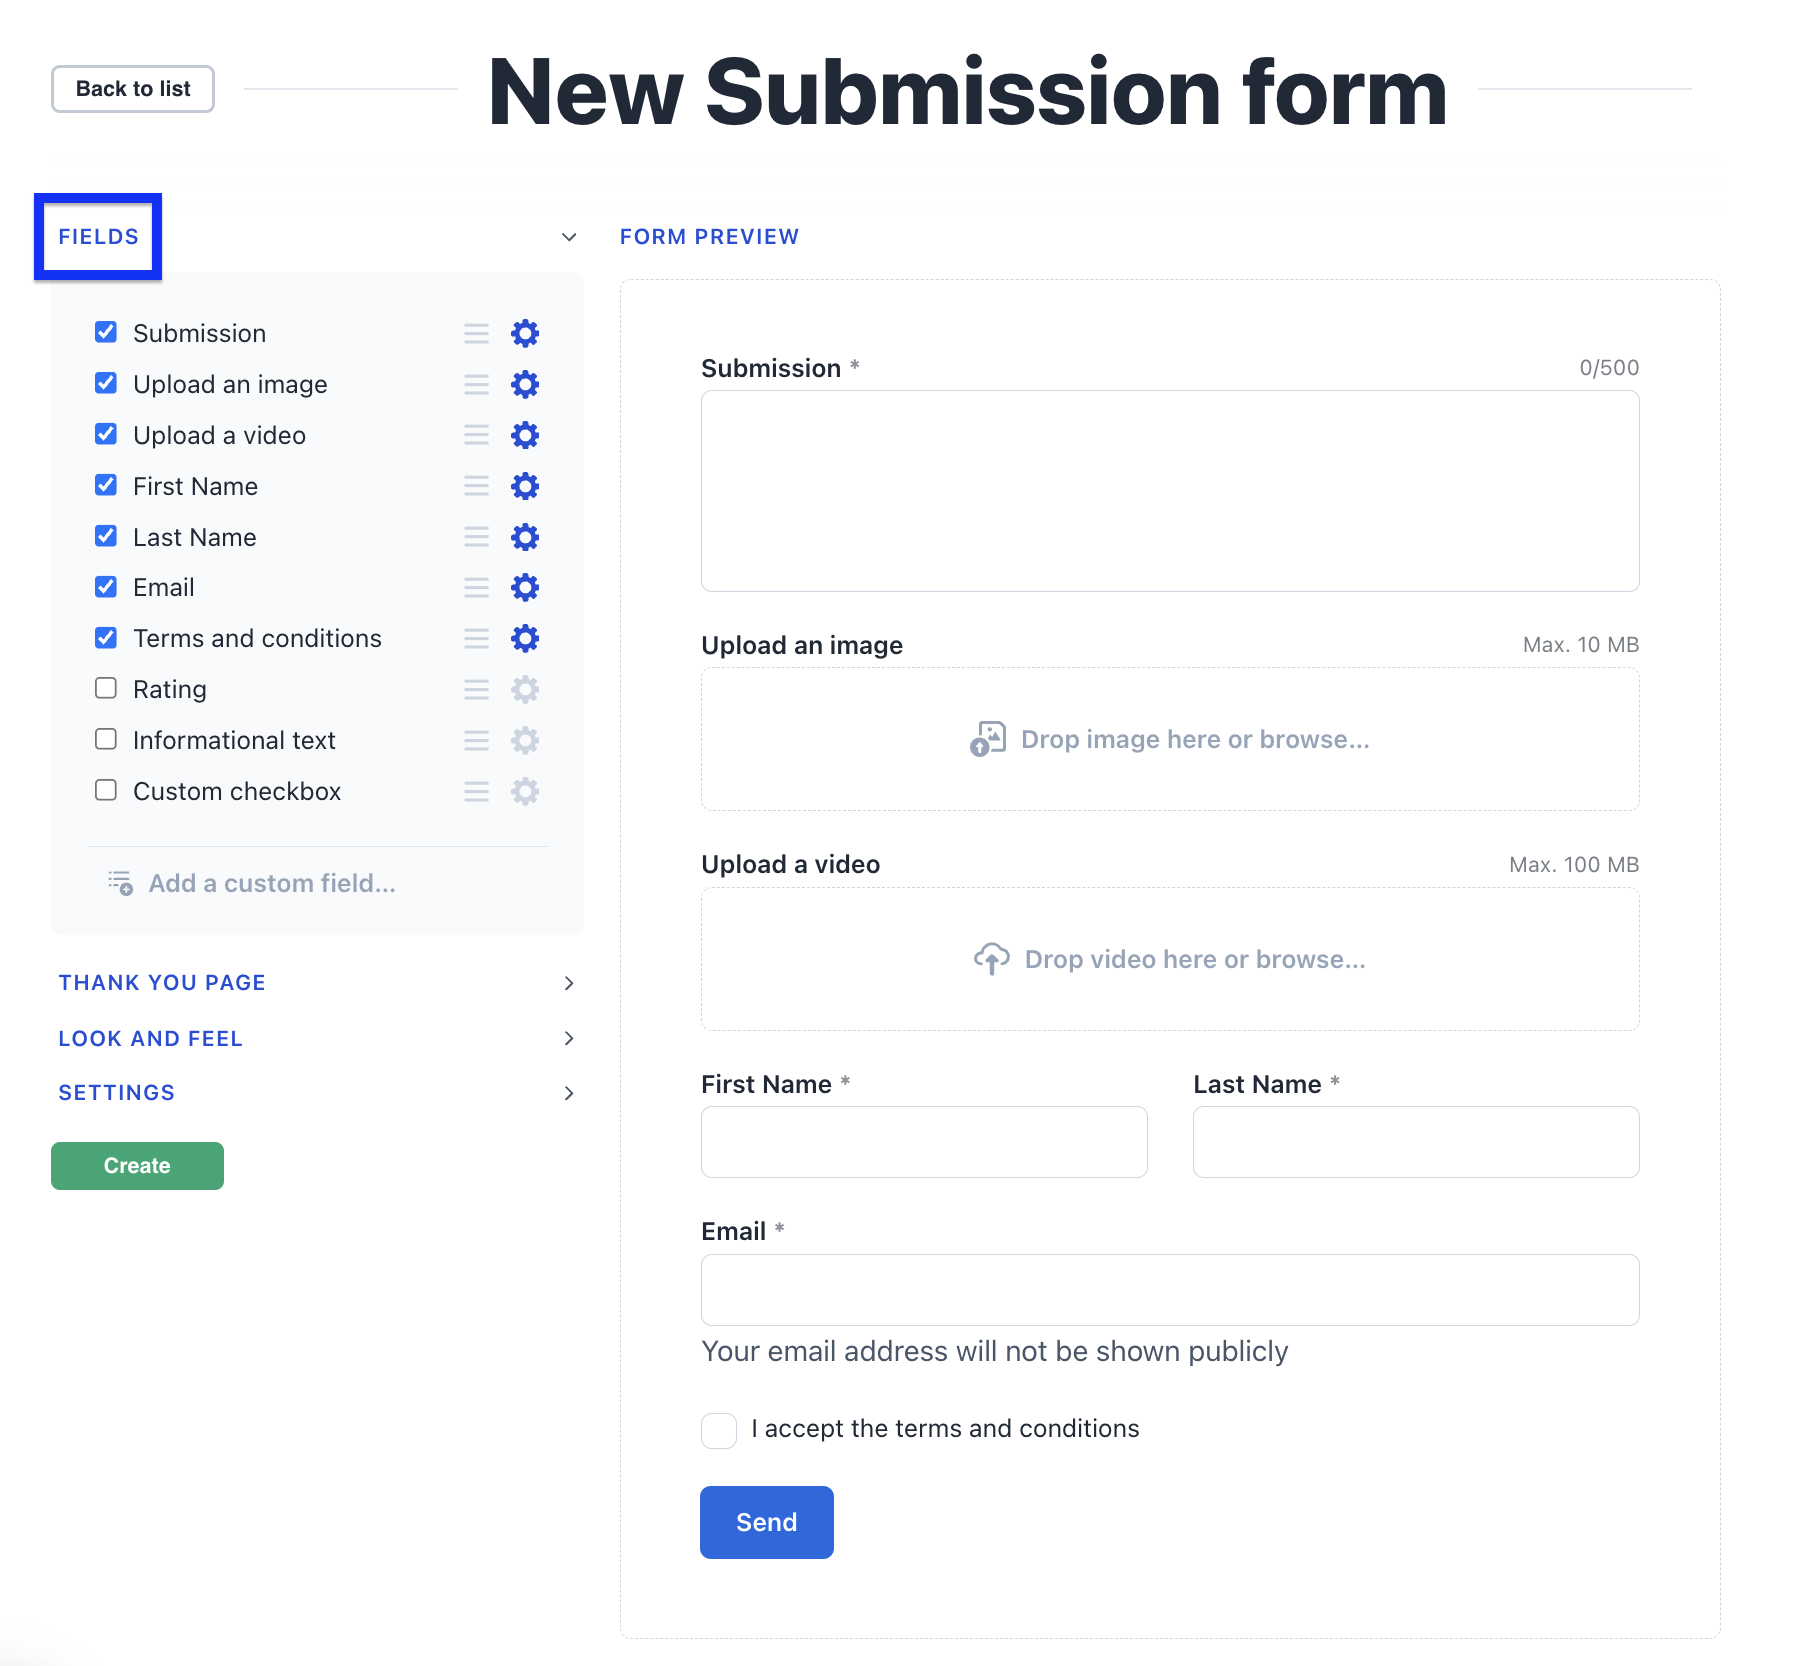
To customise a field, click the settings wheel; to reorder fields, drag them with the three-line handle.
You can also add your own custom fields:
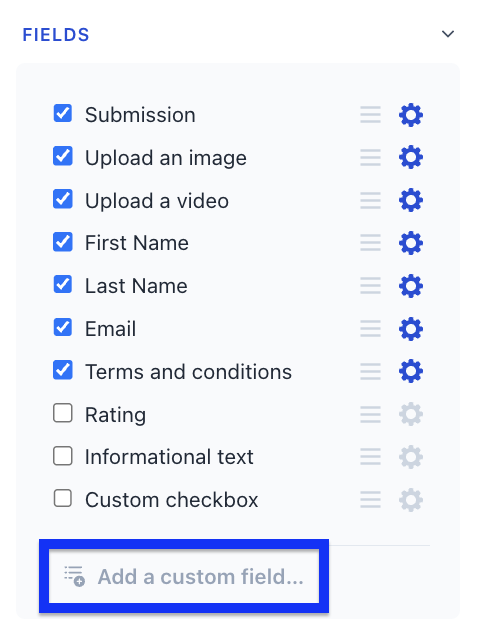
Choose how people answer. When you add a custom field, you can pick the answer type:
- Line of text or multiple lines of text — free typing, as before
- Radio buttons — pick one option from a visible list
- Dropdown — pick one option from a menu
- Checkboxes — pick several options
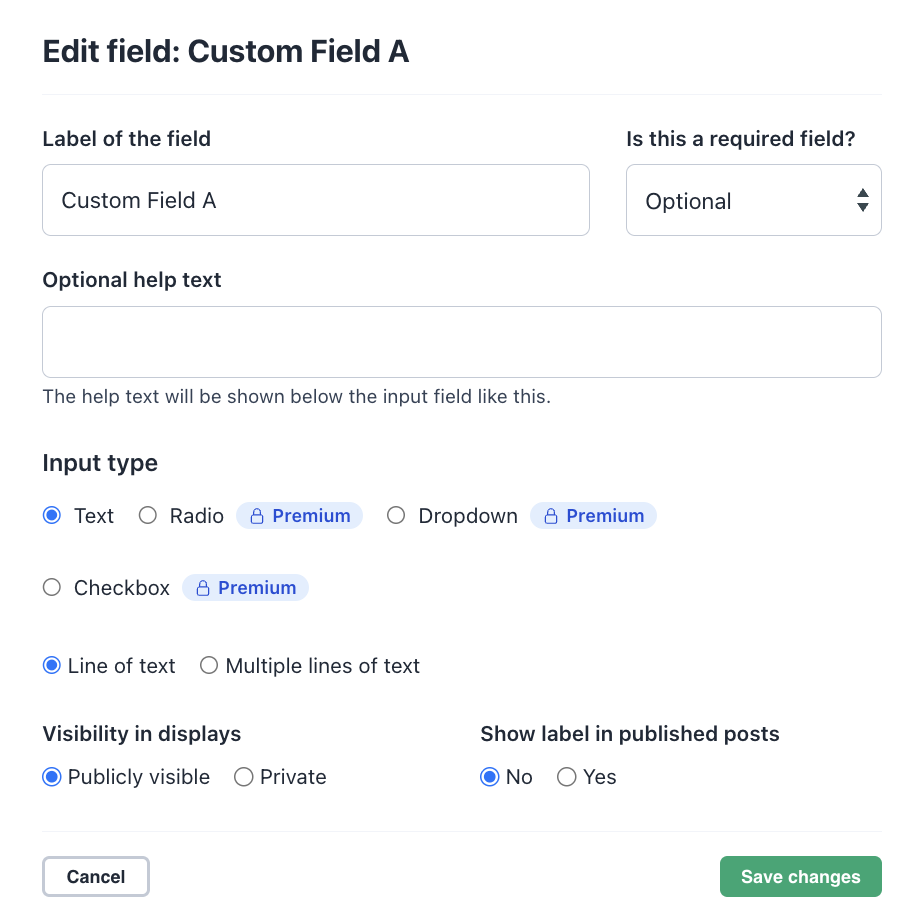
Choice fields are available on Premium Plan
Choice fields make submissions much easier to sort, filter, and moderate — handy when you’re asking things like a category, a location, or which day someone attended. Add between 2 and 10 options per field.
Step 3. Allow one or several photos
In the image upload field, choose how many images each person can upload:
- Single image (default) — one image per submission
- Multiple images — up to 5 images per submission (available on Premium Plan only)
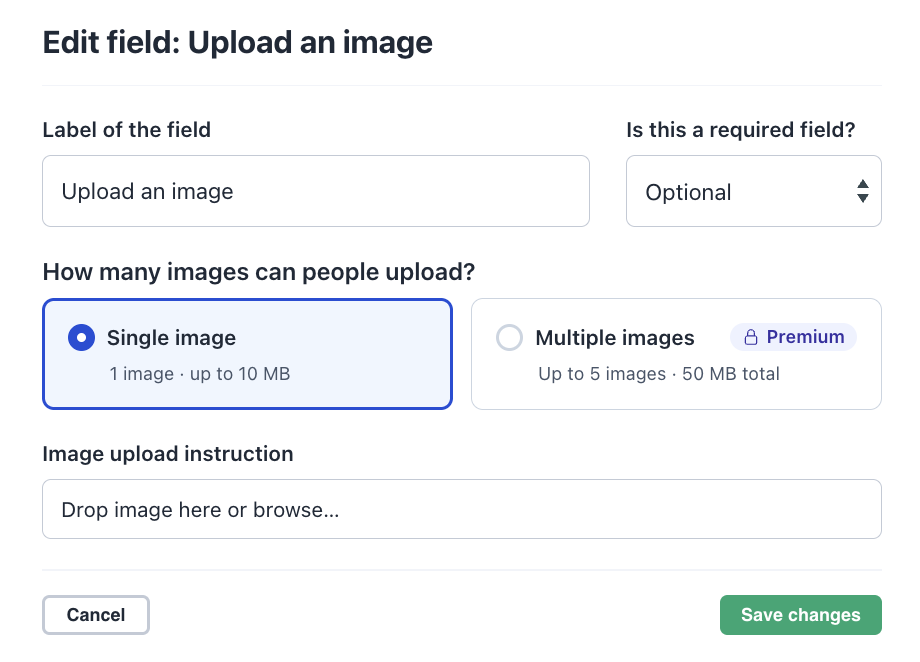
Each uploaded image becomes its own post in your section, so every photo can be moderated and displayed individually. Great for events and photo campaigns, where people usually have more than one shot to share.
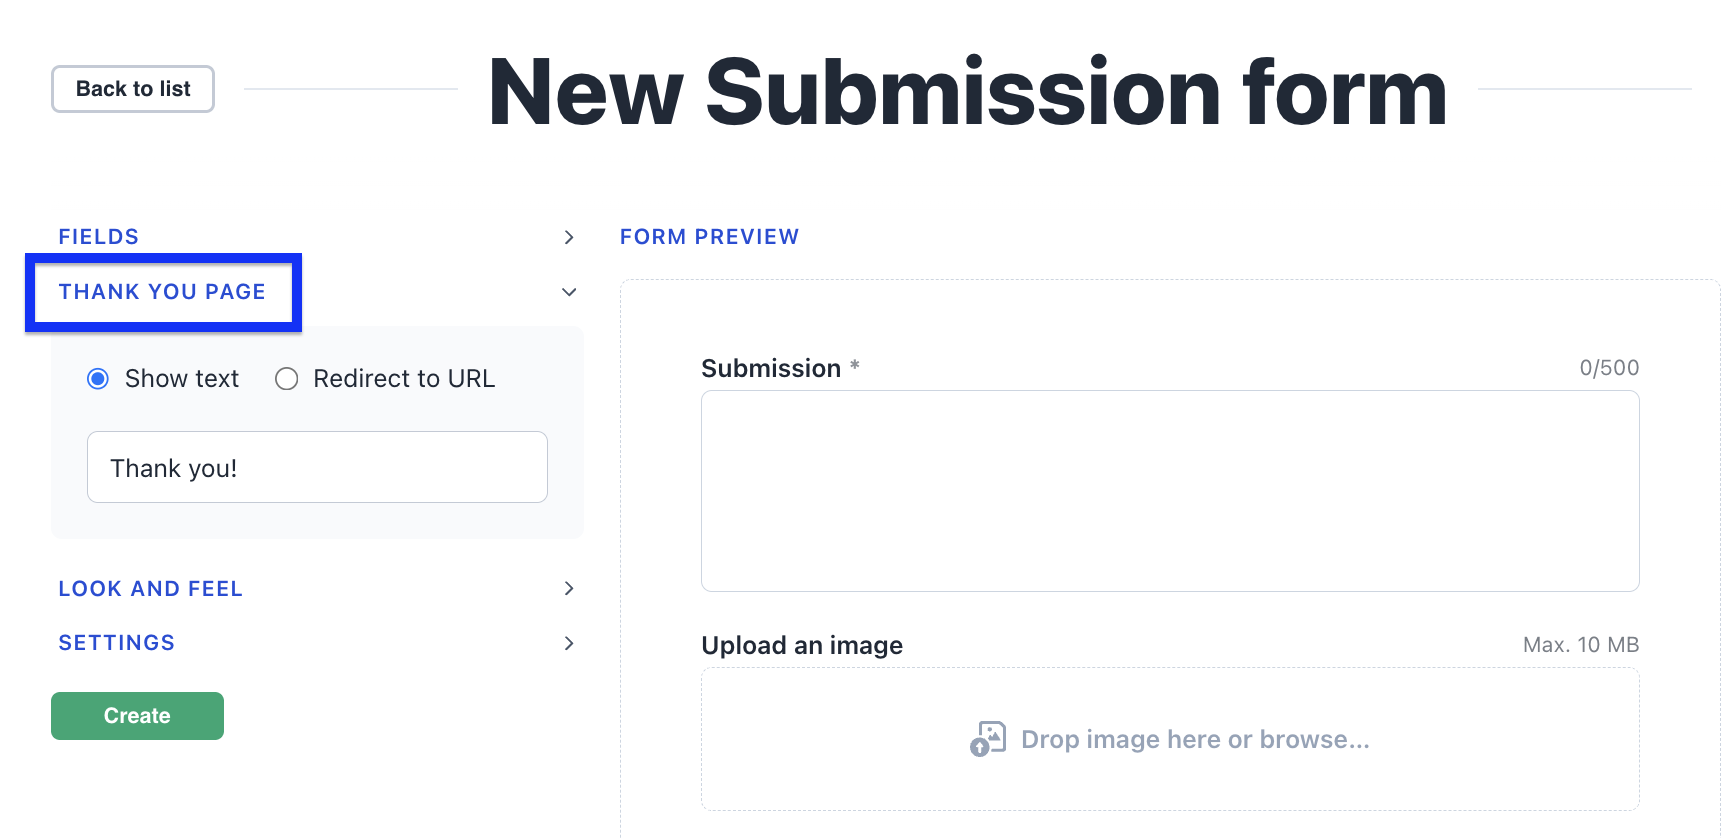
Step 4. Decide what happens after submitting
Choose whether to show a “Thank you” message or redirect people to a specific URL:
Step 5. Brand your form
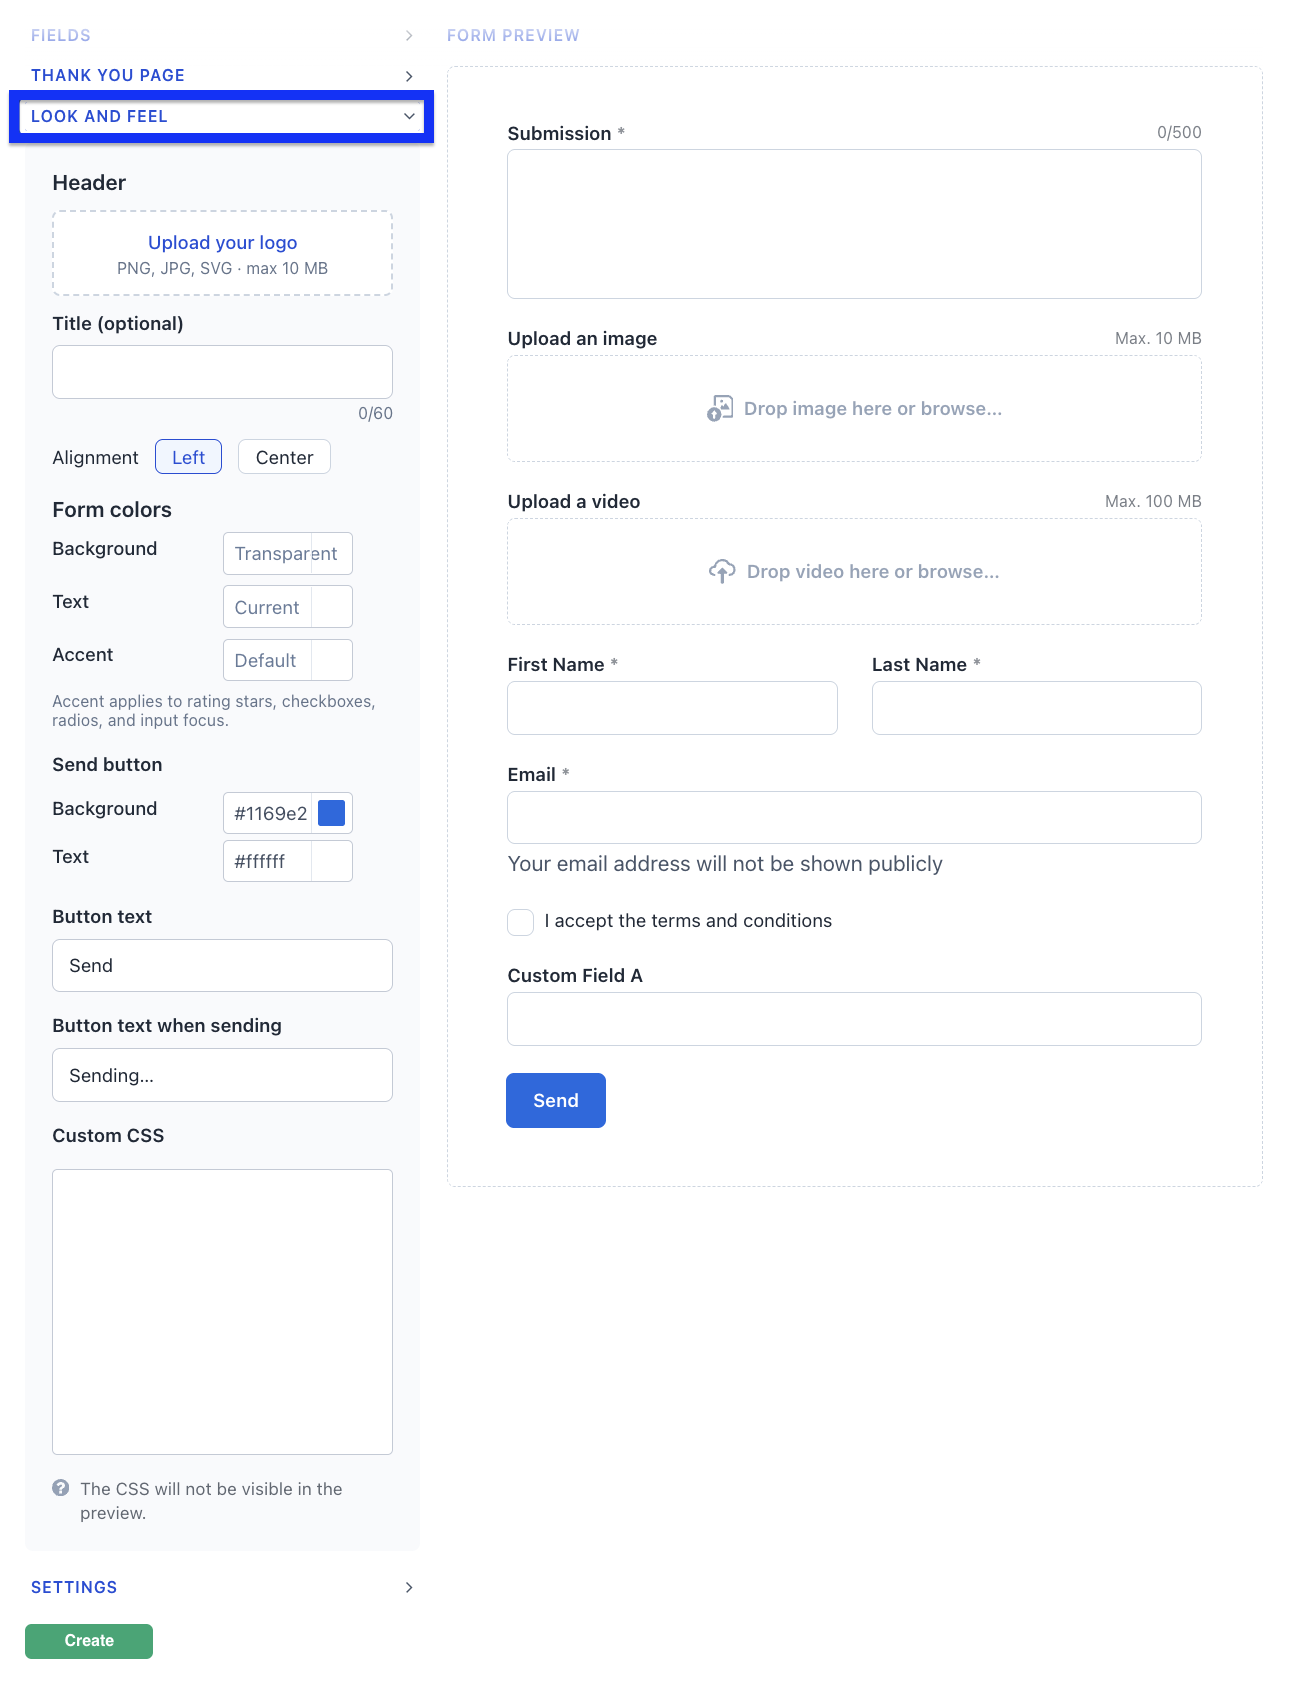
In the form’s Look & feel you can customise the form styling, choose colours and text, add headers or CSS if you want the form to match your branding more closely:
- Header — add your logo (PNG, JPG, or SVG) and an optional title, aligned left or centre, so the form is recognisably yours from the first glance.
- Form colours — set the background, text, and accent colours to match your brand. The accent colour is used for things like selected rating stars, checkboxes, and radio buttons.
You’ll see every change in the live preview before you save.
Step 6. Choose how submissions are moderated
Name your form, pick the section where submissions should go (or create a new one), and choose how submissions are handled:
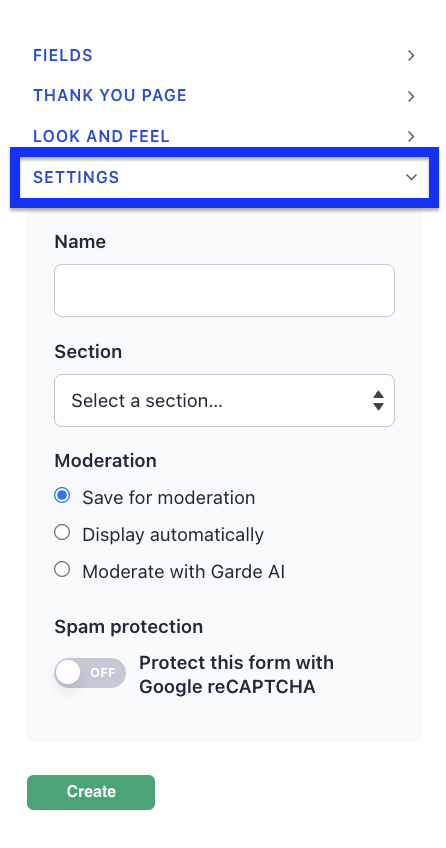
- Save for moderation — you review each submission before it’s published
- Display automatically — submissions go live without review
- Moderate with Garde AI — Flockler’s AI checks each submission and publishes the clean ones automatically, while anything that breaks your content rules is held under Hidden Items for you to review, approve, or remove. It checks submitted text and images/video thumbnails (videos aren’t analysed). This is ideal for live events, where the moderation queue can spike just when you need it to move fastest.
Garde AI moderation appears when AI moderation is available on your plan, and form submissions count towards the same monthly moderation allowance as your feeds. Learn more about AI moderation here.
Step 7. Protect your form from spam
The form settings now include a Spam protection option that protects submissions with Google reCAPTCHA, using your own reCAPTCHA v3 keys.
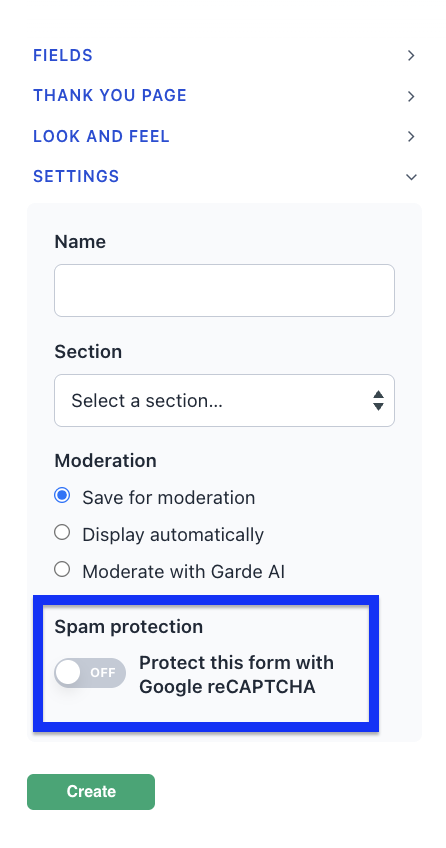
When it’s on, the check runs invisibly in the background — genuine visitors never see a challenge — and automated bot submissions are blocked before they reach moderation.
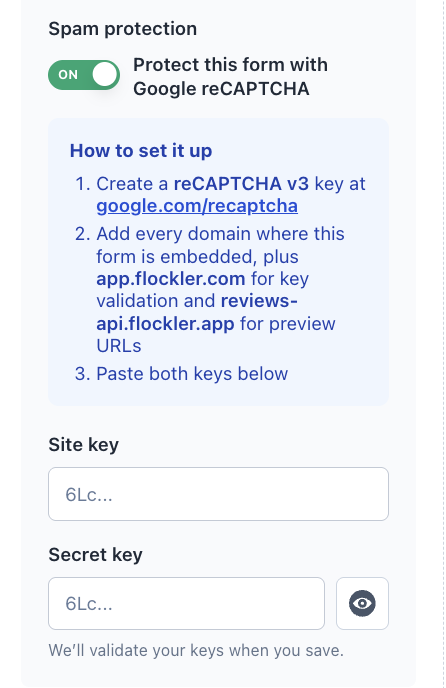
The settings include a short setup guide: create a reCAPTCHA key at Google, add the domains where your form is embedded, and paste your two keys. Because you bring your own keys, the data stays between you and Google.
Step 8. Preview and embed
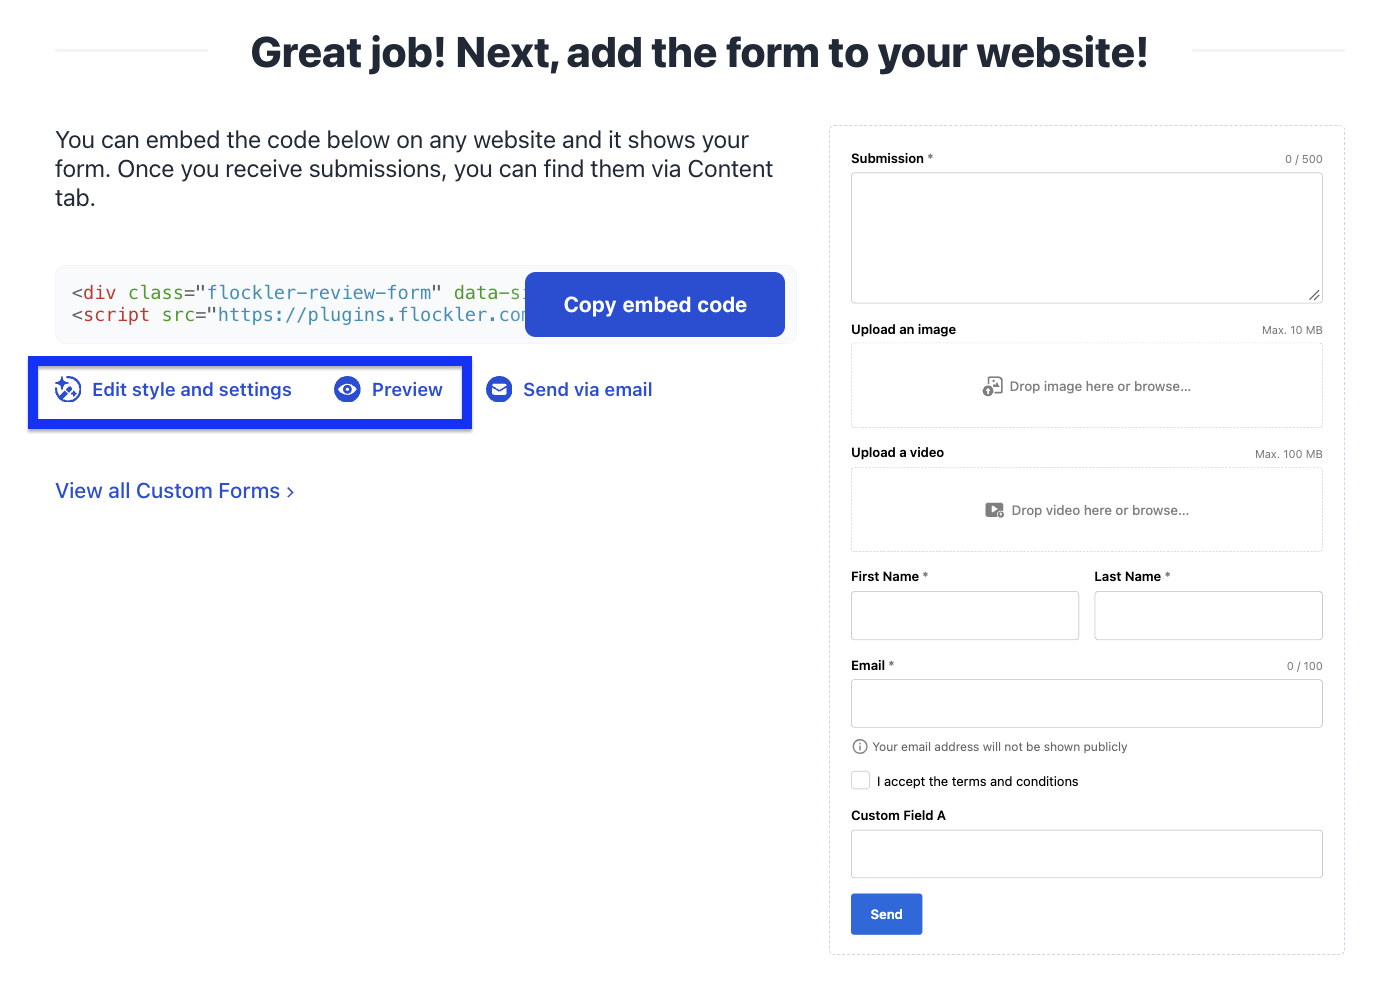
Once your form is created, you can preview how it looks. To adjust it, click Edit style and settings, then embed the form on your website.
Then create a layout for the submissions or add them to an existing one:

📱Your form is mobile-friendly — it adapts to the width of wherever you embed it, stacks neatly into a single column on small screens, and uses large, easy-to-tap fields and a full-width Send button, so people can contribute from their phones without pinching or zooming. (If you embed on a custom page, make sure it includes a mobile viewport tag so the page scales correctly.)
🎟️ Collecting at an event? Submission forms are especially powerful during events — you can even show a QR code on your social wall that links straight to your form, so attendees scan, upload, and watch their post appear on screen. Learn more on how to use Flockler during an event.
🙌 Need help?
Chat with us using the widget in the bottom-right corner, or email team@flockler.com.