What is UGC Rights Management?

You don’t need permission to embed user-generated content on your website, apps, and digital displays.
However, if you’d like to modify the user-generated content and, for example, use it in Facebook advertising, you need to request rights.
Here are a few examples of why you might want to request UGC rights:
- Use the user-generated content in a post on your social media account.
- Download the customer’s photo or video and use it in social media advertising.
- Modify the image and use it in a print catalogue
- Request to get the original, high-quality image or video from your customer.
- Use the content in brand marketing even if the user deletes it or turns their profile private on a social media channel.
- Ask the user to confirm they are the rightful owner of the content.
How to request UGC rights on Flockler
There are two ways to request UGC rights:
1. Request rights via Instagram and X (formerly Twitter)
To request rights via social media, follow these steps:
-
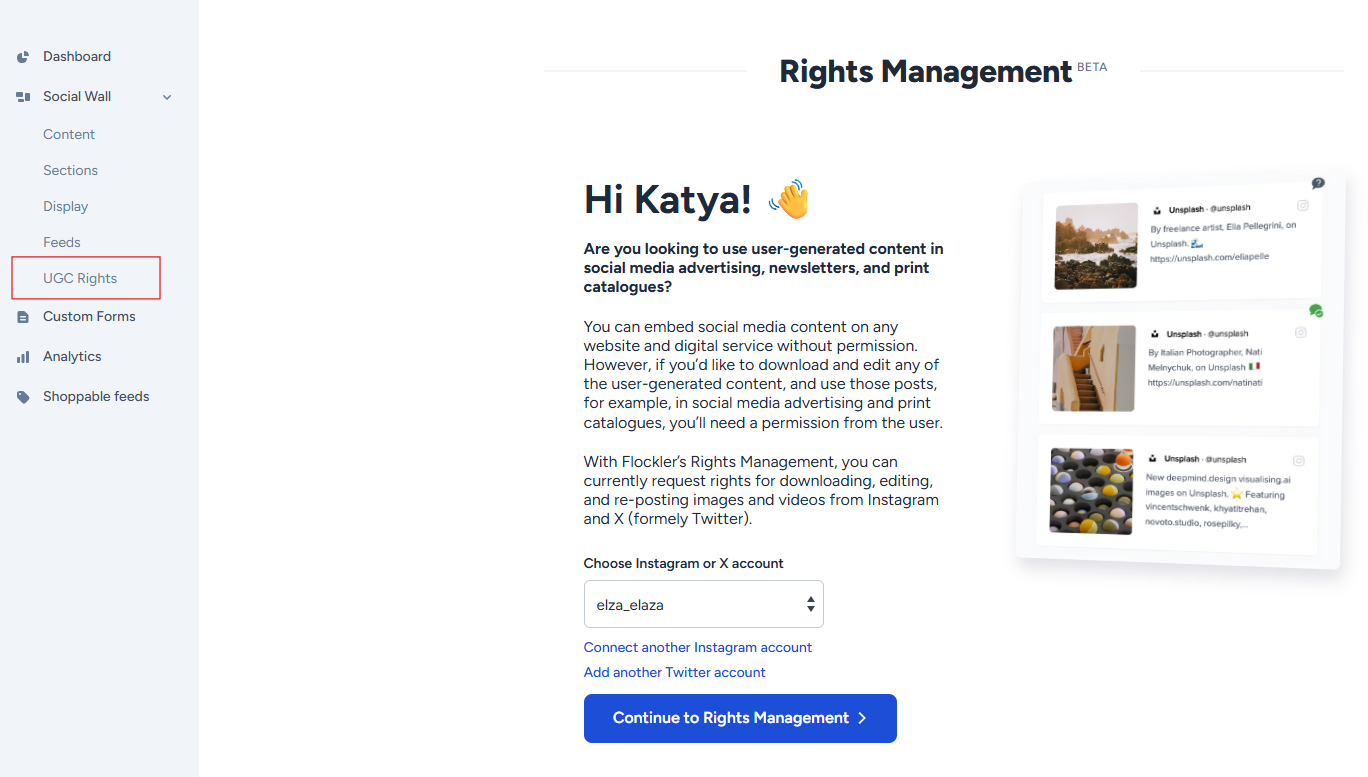
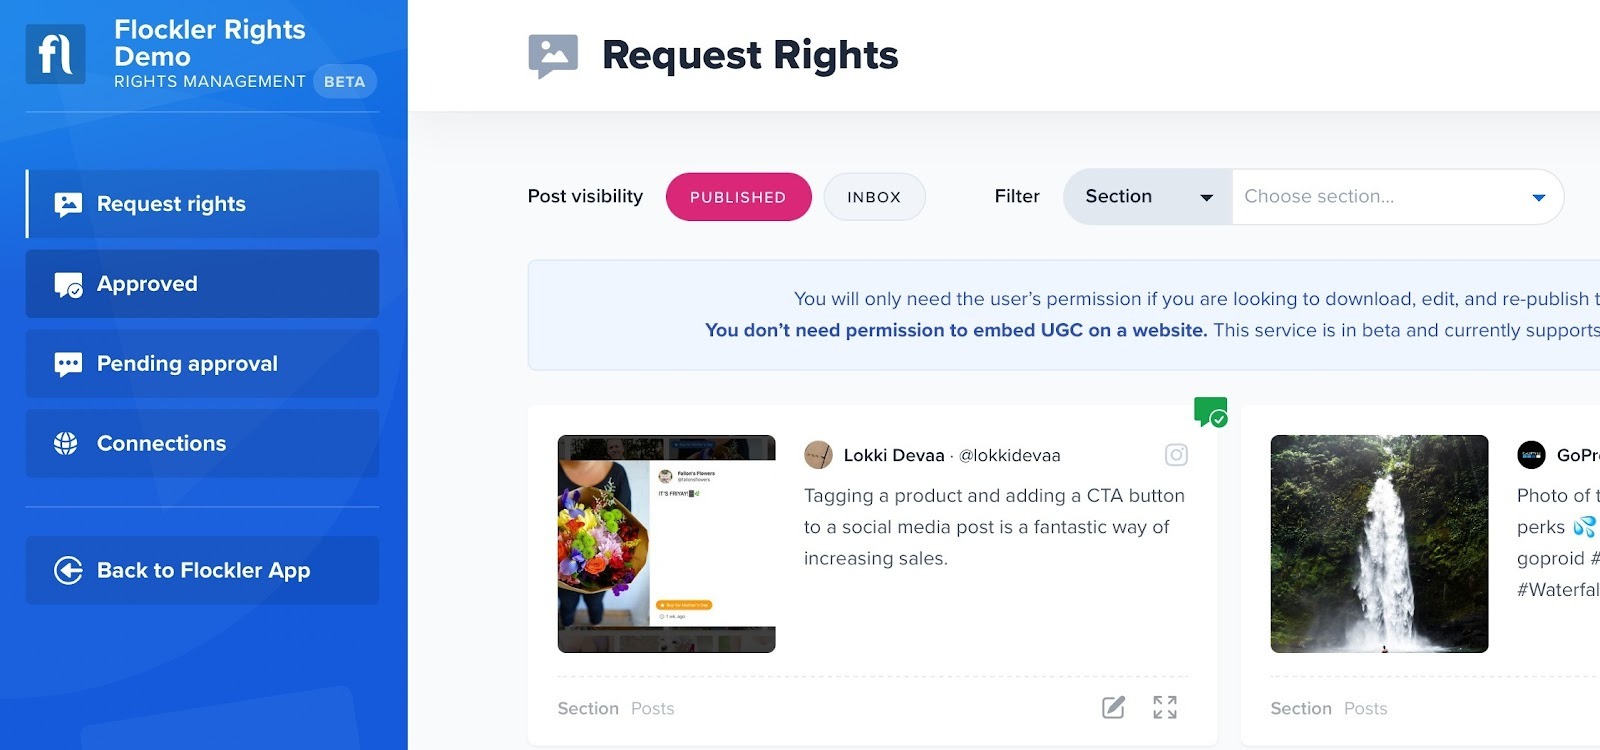
Go to the 'UGC Rights' tab, choose or connect your X and Instagram accounts, and click the 'Continue to Rights Management' button.
-
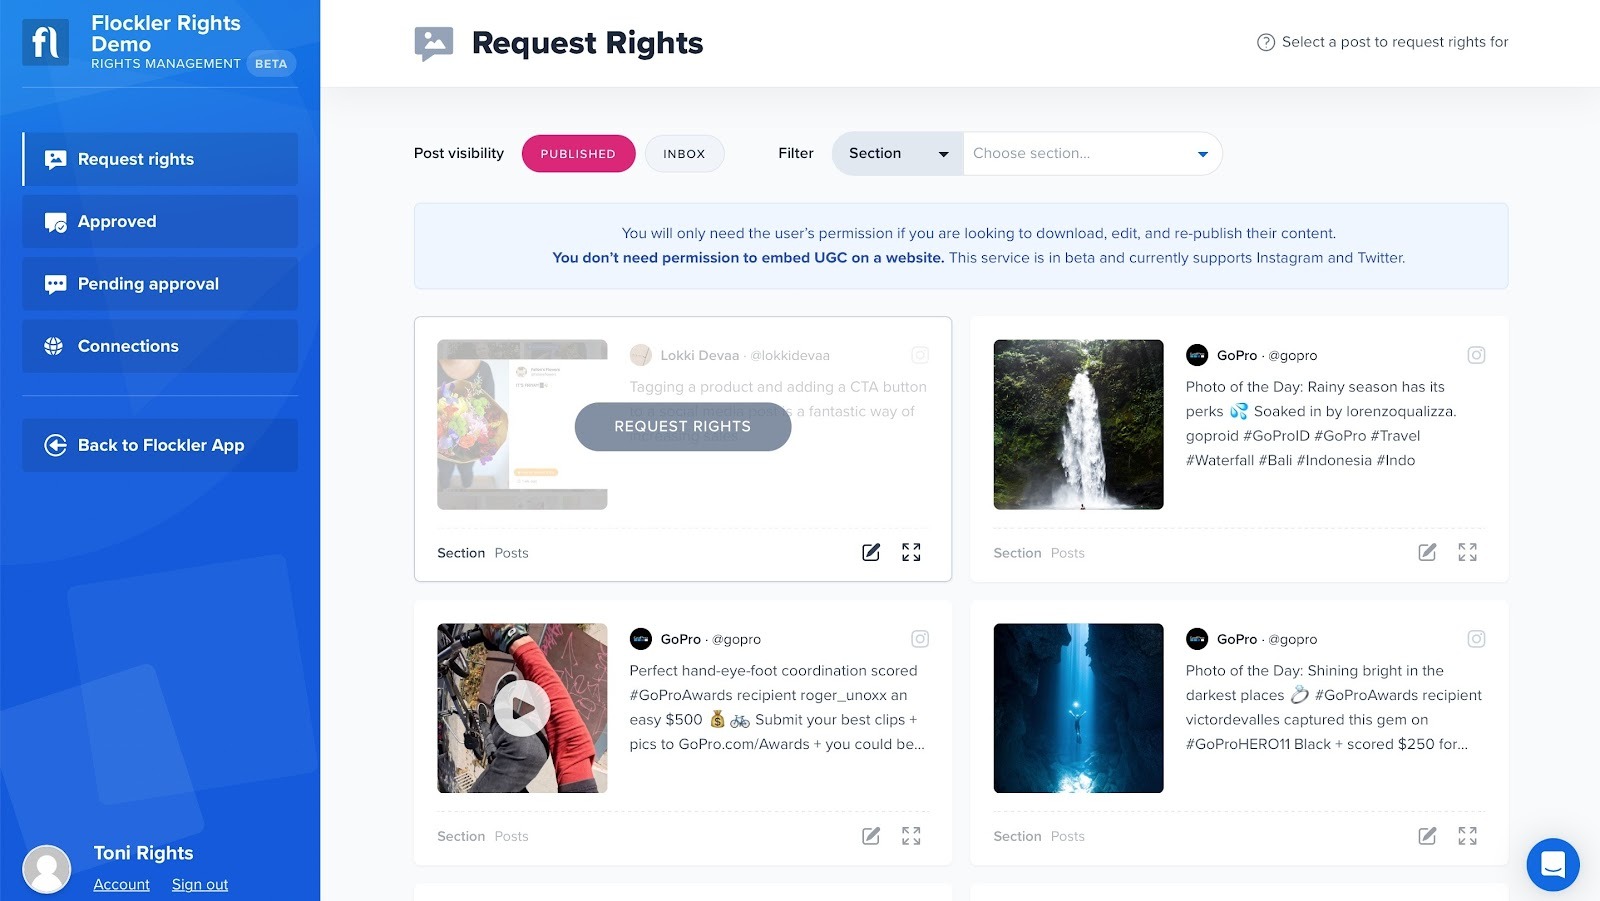
Choose one of the UGC posts you’ve saved in Flockler.
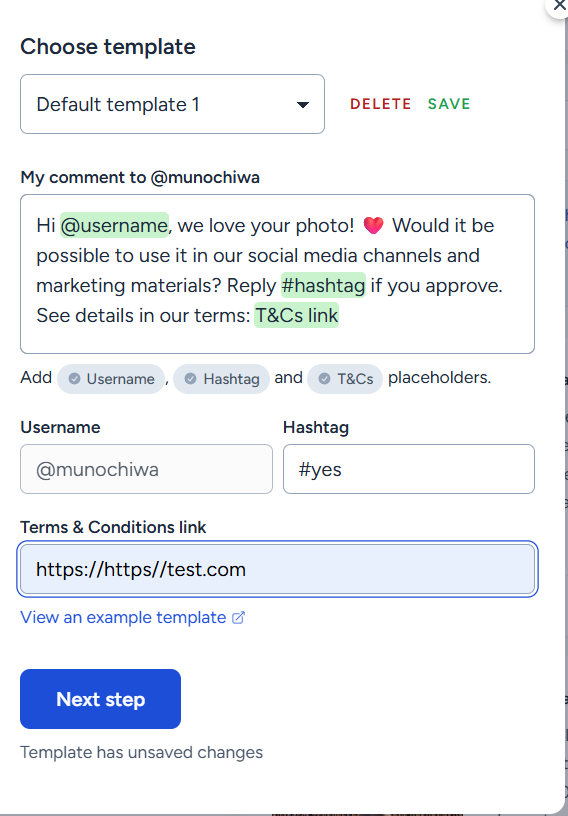
- Select one of the ready-made message templates or create a custom message, add a Terms and Conditions link, and click ‘Next step’


- Follow instruction

-
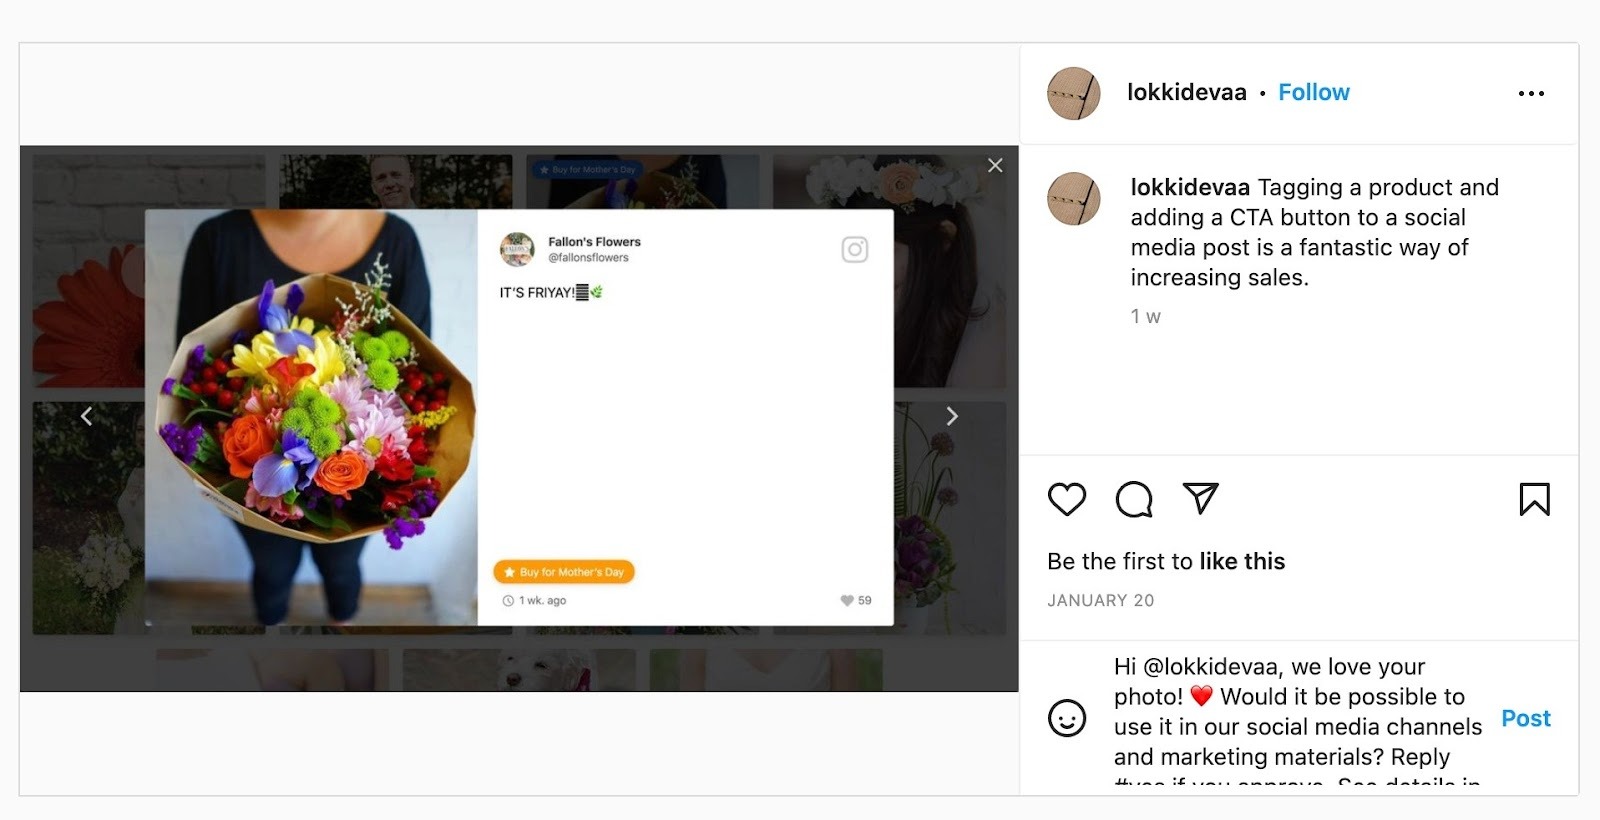
Open the social media post and leave a comment. Double-check that you are commenting with your company and not your personal profile.
-
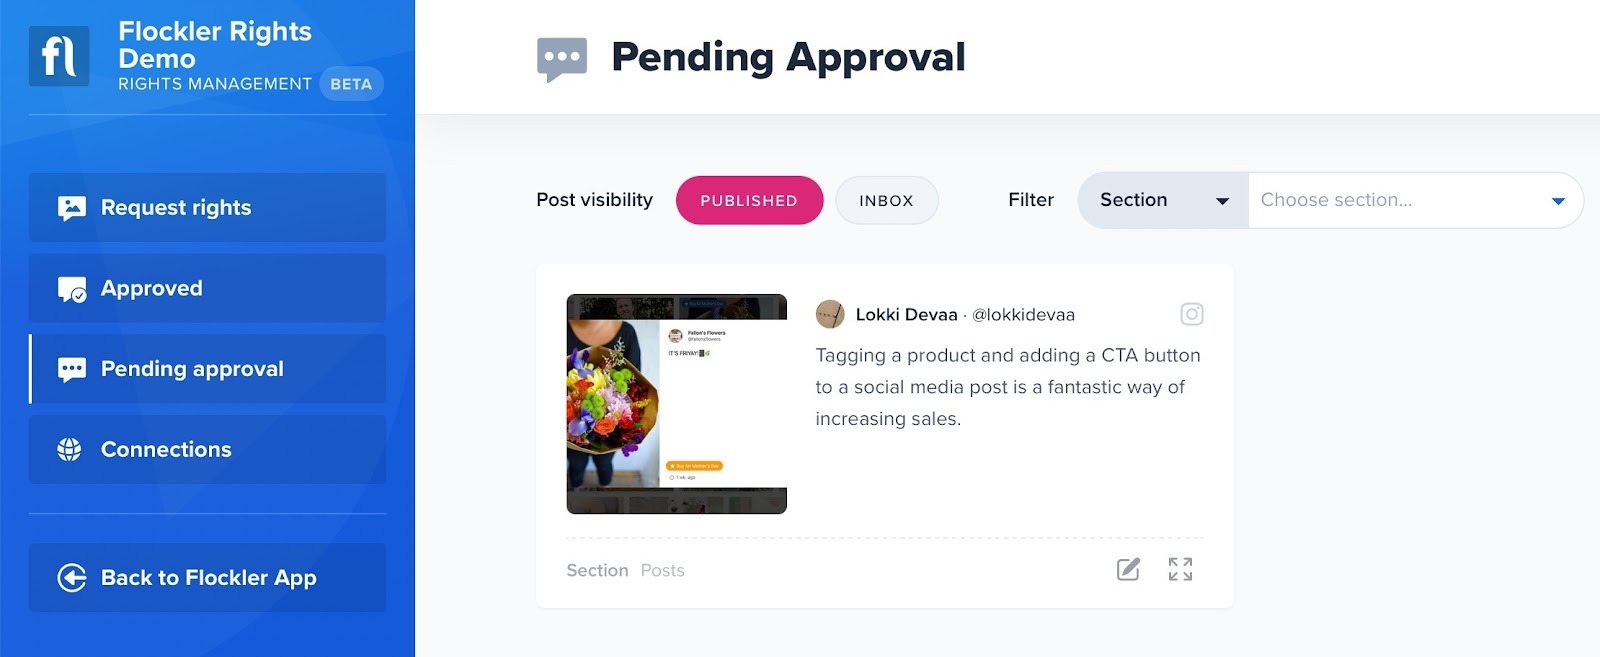
Now, click the 'I’ve done it' button, and Flockler starts listening to the post comments. You can find the post on the 'Pending approval' tab.
-
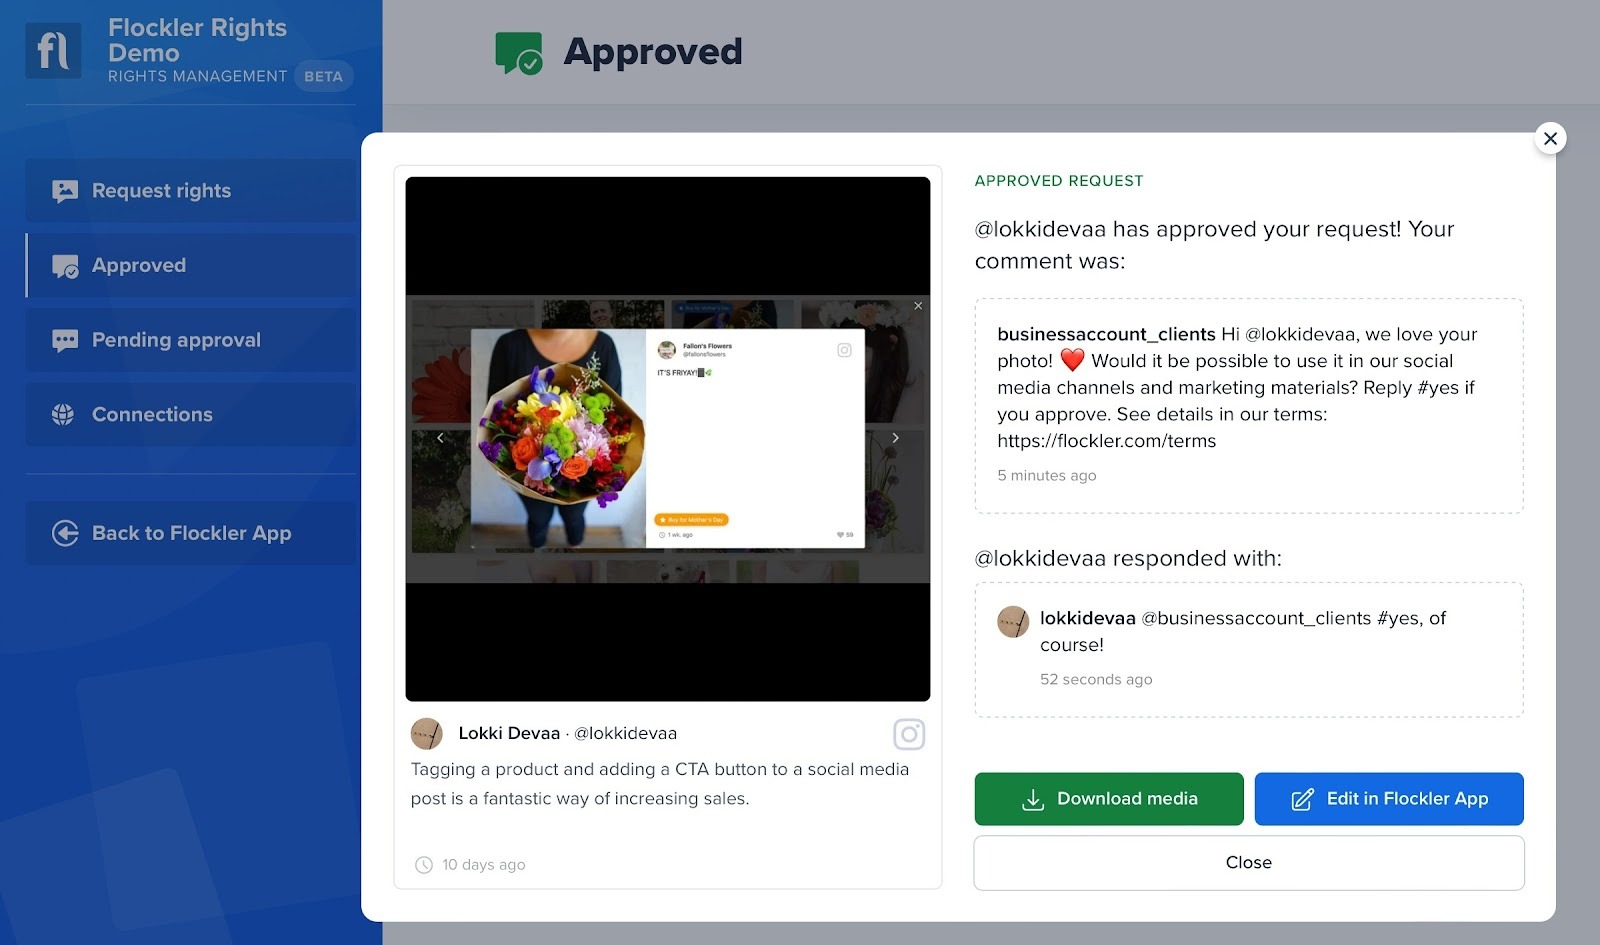
When the user replies and if they mention your chosen hashtag, the post moves to the 'Approved' tab, and the post has a green icon.
-
If you click to open the post, you can find a copy of the comment left by the user and a button to download the media for later use.


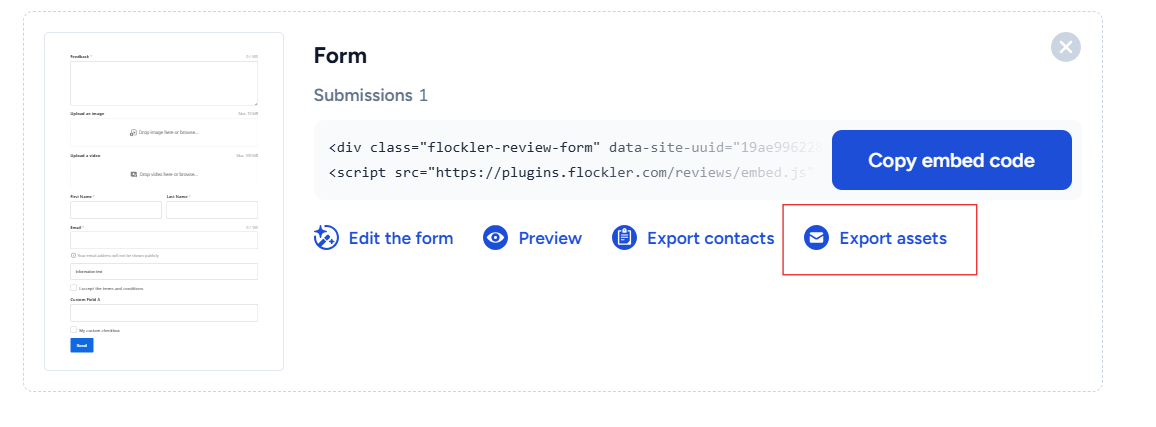
2. Request rights via the Direct Upload form
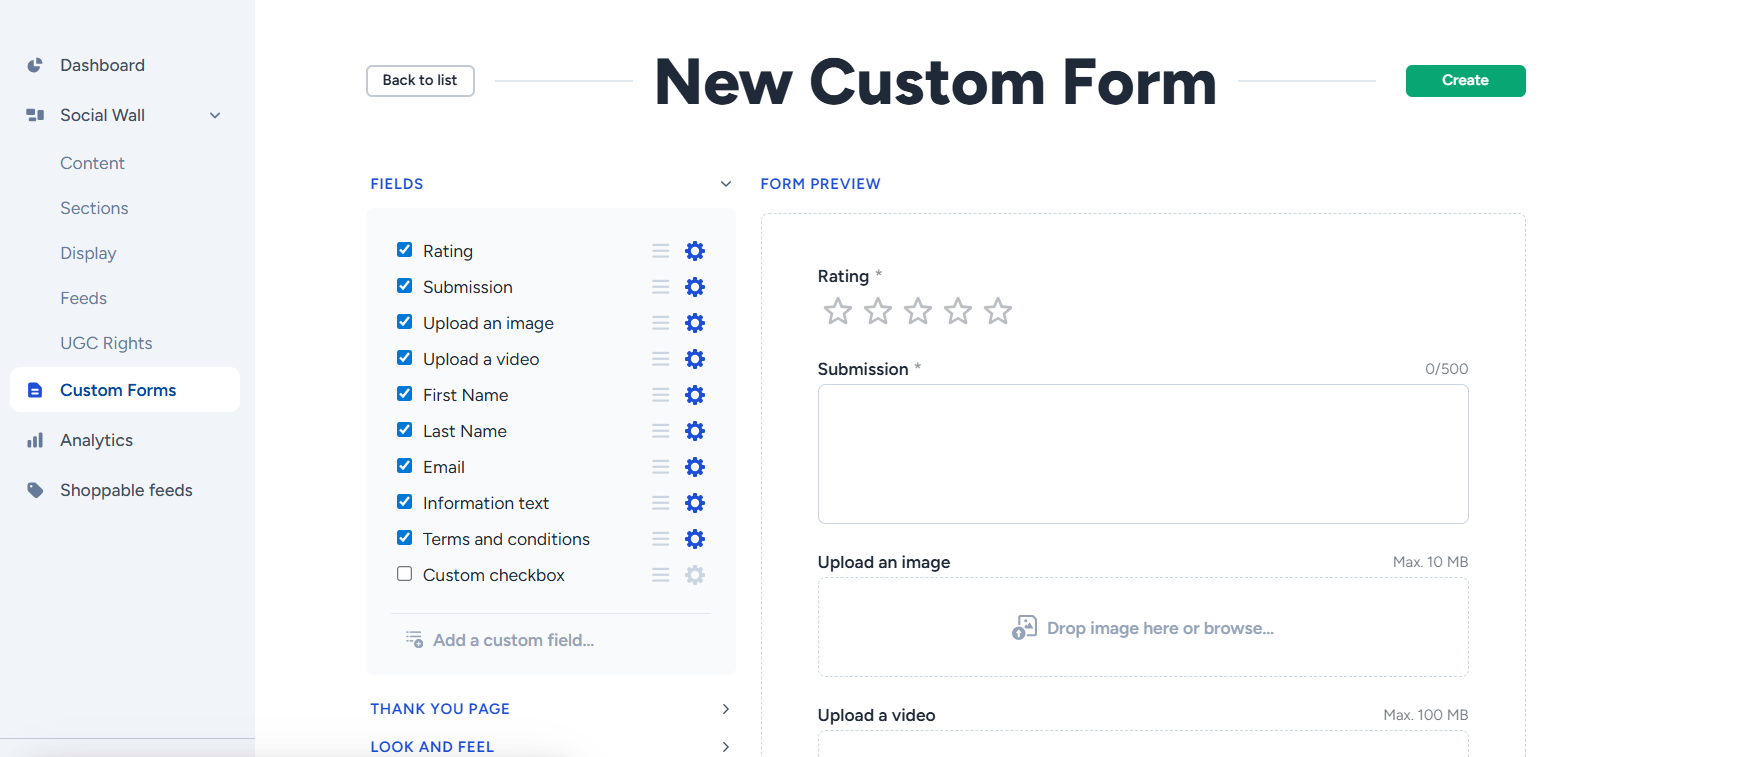
Sometimes, you might need a high-quality image file, and that’s when Flockler’s Custom Forms feature comes in handy.
To gather content with a direct upload form, follow this step‑by‑step guide on how to create a custom form.
- Go to the 'Custom form' tab
-
Create an upload form. You can customize the fields and look & feel.
- Embed the form on a page on your website.
- Share the form with your customer via social media or email. After you’ve received the content, you can embed it on your website and download the image for re-publishing.

🙌 Need a Hand?
Our support team is here for you every step of the way.
💬 You can reach us via Messenger in the bottom‑right corner