
Setting up single sign-on (SSO)
Single sign-on is available on the Premium plan only, and it is enabled by request. Email team@flockler.com and we will switch it on for your organisation.
Single sign-on lets your team sign in to Flockler with your own identity provider instead of a Flockler password. Access is managed in one place, and people sign in with the credentials they already use at work.
Flockler works with Okta, Microsoft Entra ID (Azure AD), Google Workspace, OneLogin, Salesforce, JumpCloud, Cloudflare, Auth0 and any other provider that supports SAML 2.0 or OpenID Connect (OIDC).
SSO settings apply to every Flockler site included to your Subscription:

You do not have to do this alone
Two parts of this setup are technical, and both can be handed off:
| Action | Who usually does it |
|---|---|
| Adding a DNS TXT record to verify your domain | Whoever manages your DNS — IT, your web team, or your hosting provider |
| Configuring the identity provider | Whoever administers Okta, Entra ID, or Google Workspace |
Flockler generates a secure setup link that you can copy and send to that person. They complete the identity provider configuration in their own browser and do not need a Flockler login to use the link.
There is a companion article written for them: Connecting your identity provider to Flockler — send it along with the link.
And because additional Flockler users are free, you can also simply invite your IT colleague into Flockler and let them run the whole setup themselves. See how to invite more users to your Flockler account.
Before you start
- Your plan must be Premium, and SSO must be enabled for your account by our team (team@flockler.com).
- You need to be an Owner in Flockler. Managers do not see the SSO tab.
- Have the email domain your team signs in with ready, for example
acme.com.- Have access to your DNS settings, or someone who does.
Step 1. Open the SSO settings and enter your email domain
- Go to Settings → SSO.
- In the Set up single sign-on card, enter the email domain your team uses, for example
acme.com. - Select Get started.

A Get set up checklist appears, showing where you are in the process:
- Add and verify an email domain
- Connect your identity provider
- Test a sign-in
- Require SSO for your domain (optional)

Step 2. Verify your email domain with a DNS record
Verifying proves the domain belongs to you, so nobody else can use it for SSO.
Under Email domains, your domain is listed as Pending verification:

Adding the record
- Sign in to your DNS provider — Cloudflare, GoDaddy, Route 53, your hosting control panel, and so on.
- Add a new DNS record using the values above.
- Save the record.
- Return to Flockler and select Verify.
💡 Not the person who manages DNS? Copy the three values:
- Type
- Name
- Value
and send them to whoever does (along with Connecting your identity provider to Flockler (SSO) DNS step). Once they confirm the record is live, you select Verify yourself.
DNS changes usually propagate within a few minutes, but can take longer. If verification fails, wait and select Verify again.
When it succeeds, the domain shows a green Verified badge and the message "TXT record found. This domain is verified."

Multiple domains? Select + Add domain to add and verify as many as you need. This is useful if your team uses more than one email domain, or after a rebrand or acquisition.
Step 3. Generate the setup link for your identity provider
This is the handoff point.
- Scroll to Identity provider.
- Select Generate setup link.
- Read the confirmation and select Generate link.

Flockler creates your organisation's tenant with our SSO provider and generates a link to its setup portal.

You will then see the link, its expiry time, and you can copy the link and share it with the person who manages your identity provider:

⚠️ The link is valid for 24 hours and it grants access to your SSO configuration. Share it only with the person who manages your identity provider, and send it privately. If it expires, select Generate new link. You can also share it along with Connecting your identity provider to Flockler guide.
Step 4. Your IT colleague configures the identity provider
The person you sent the link to opens the setup portal, picks your protocol and provider, and follows the guided steps. The full walkthrough is in Connecting your identity provider to Flockler.
You do not need to do anything while this happens. Continue to Step 5 once they confirm it is done.
Step 5. Choose what new members get access to
Under Access for new members, decide what someone gets the first time they sign in with SSO. Changing this later does not remove access anyone already has.
👤 Roles:
- Manager — can manage content, feeds and layouts.
- Owner — full access, including billing and SSO settings.

💡 Recommended: set the role to Manager. Everyone who signs in via SSO receives that role automatically, and you can promote individuals to Owner afterwards on the Users tab.
Step 6. Test the sign-in
Ask someone with an email address on your verified domain to try it, or test it yourself in a private or incognito window:
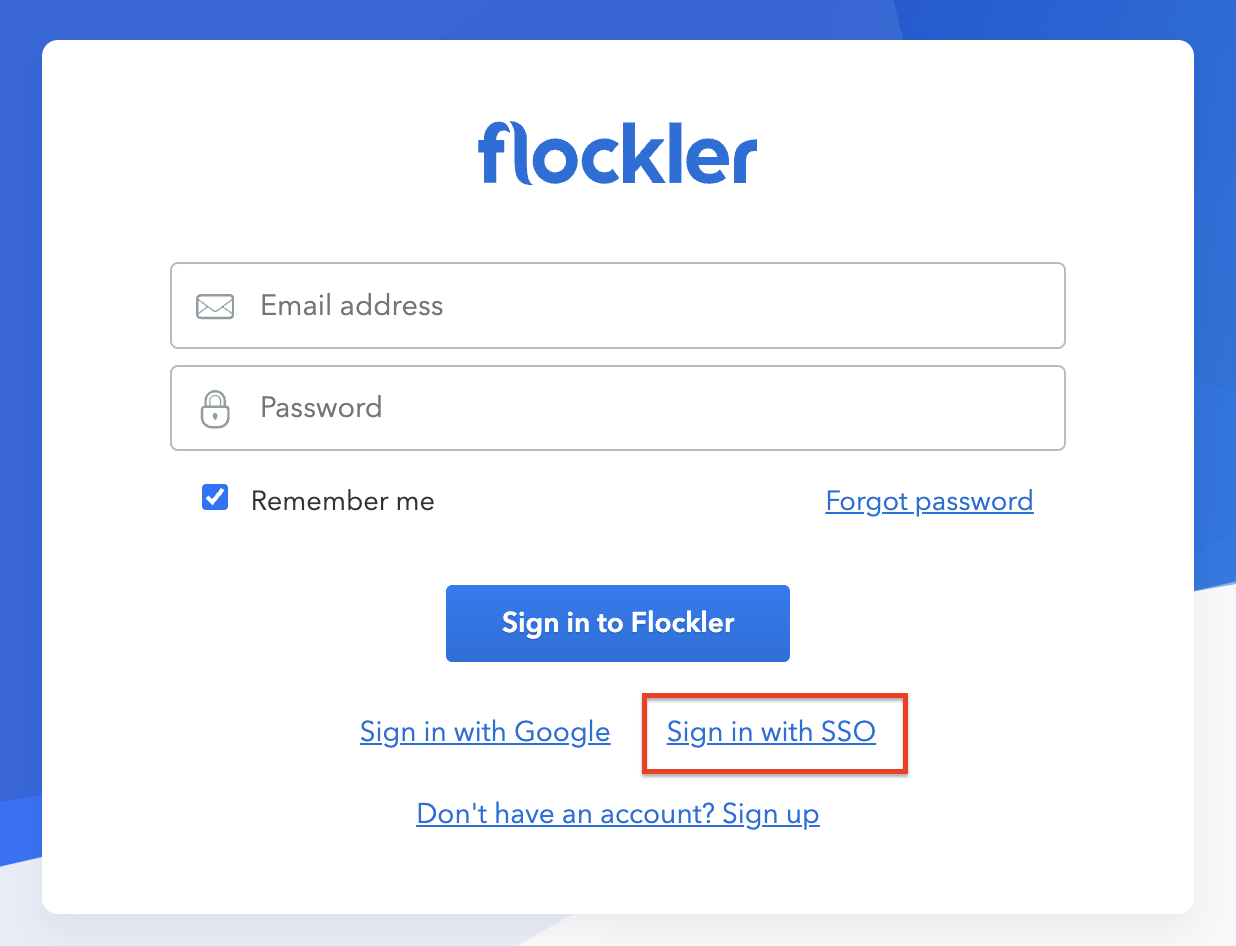
- Go to the Flockler sign-in page.
-
Select Sign in with SSO:
-
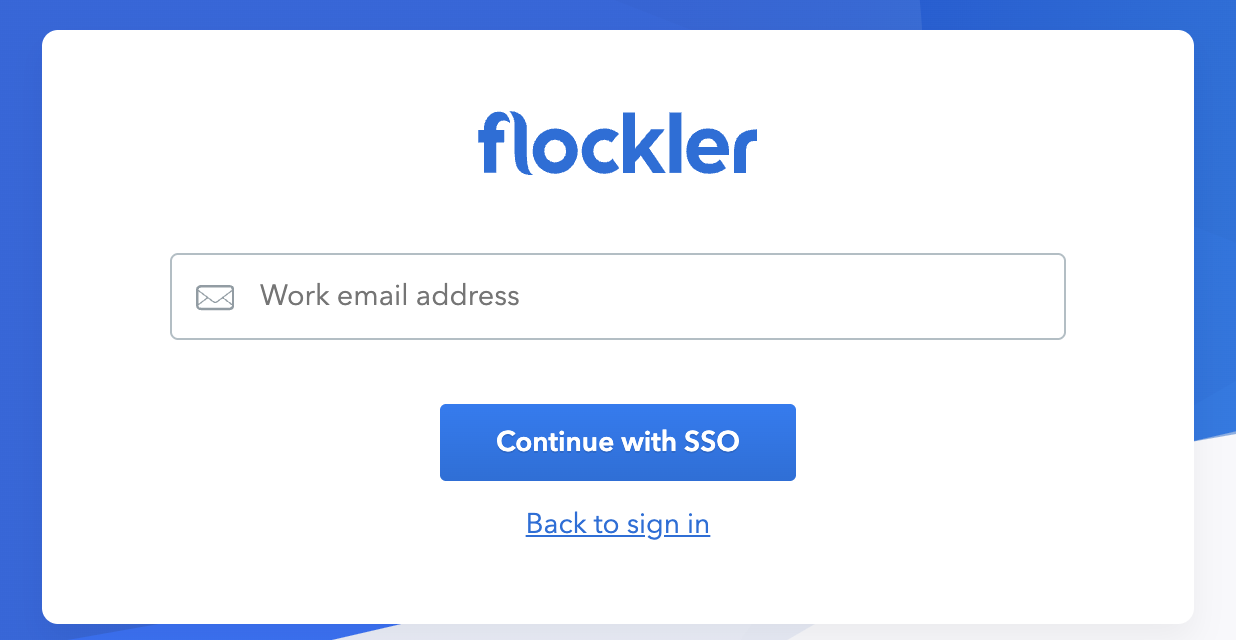
Enter the work email address and select Continue with SSO:
- Flockler redirects to your identity provider, then back into Flockler once authenticated.
Every sign-in attempt appears in the Sign-in log at the bottom of the SSO tab, with the time, email address, outcome and IP address. Use it to confirm the test worked and to troubleshoot failures.

Step 7. Require SSO for your domain (optional)
Once at least one person has signed in successfully, you can make SSO mandatory for everyone with an address on that domain. After that, they can no longer sign in with a Flockler password.
Under Email domains, turn on Require SSO for everyone with an @yourdomain address.

The toggle stays locked until someone has signed in with SSO from that domain at least once. That is deliberate: it prevents you locking your whole team out of a setup that does not work yet.
You can leave this off indefinitely if you would rather let people choose between SSO and a password.
Managing SSO after setup
Everything lives on Settings → SSO:
- Email domains — add or remove domains, and toggle the SSO requirement per domain.
- Identity provider — reopen the portal or generate a new setup link to change providers or update the connection.
- Access for new members — adjust the default role and site access.
- Sign-in log — review every SSO sign-in attempt across your organisation.
Danger zone
- Pause single sign-on — SSO sign-in stops working immediately and any domain requirement lifts, so members sign in with a password again. Your settings and members are kept. Use this if the identity provider connection breaks and you need everyone back in quickly.
- Remove single sign-on — permanently deletes your identity provider connection and every SSO setting across all your sites. Members keep the access they already have, but you manage it by hand from then on.

Troubleshooting
- Domain verification keeps failing. DNS can take longer than a few minutes to propagate. Check that the record type is TXT, that the value was pasted in full with no trailing spaces, and whether your provider needs only the subdomain part or
@for the root. Then select Verify again. - The setup link expired. Select Generate new link in the Identity provider section and send the new one.
- A colleague cannot sign in with SSO. Check three things:
- their email address is on a verified domain
- they are assigned to the Flockler app in your identity provider
- the attempt appears in the Sign-in log with a failure reason.
- I cannot see the SSO tab. SSO is available on Premium and must be enabled for your account — email team@flockler.com. You also need to be an Owner of your Flockler account.
🙌 Need a Hand?
Our support team is here for you every step of the way. You can reach us via Messenger in the bottom‑right corner, or email us to team@flockler.com